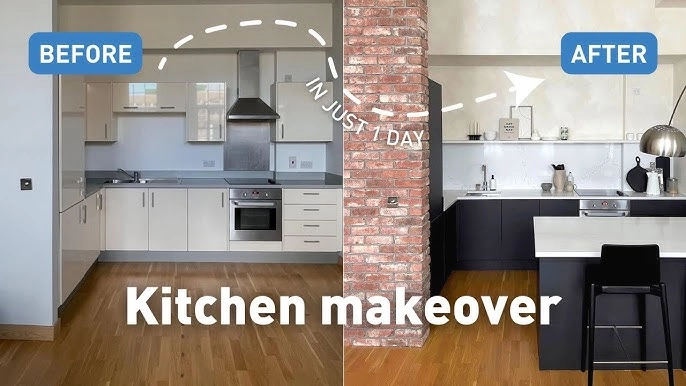
A full kitchen renovation can be expensive and disruptive, often taking weeks to complete. However, with interior films and a single weekend, you can dramatically transform your kitchen's appearance at a fraction of the cost. This step-by-step guide will walk you through the process of updating cabinets, backsplash, and countertops with interior films.
Materials You'll Need
- Interior films in your chosen finishes (measure carefully to ensure sufficient quantity)
- Squeegee or application tool
- Utility knife with fresh blades
- Measuring tape and straight edge
- Isopropyl alcohol (90% or higher)
- Microfiber cloths
- Heat gun or hair dryer
- Cutting mat (optional but recommended)
Friday Evening: Preparation
Begin your project on Friday evening by preparing the surfaces and organizing your materials. Remove all hardware from cabinets, including handles, knobs, and hinges. Clean all surfaces thoroughly with isopropyl alcohol to remove grease, dirt, and residues that could affect adhesion. Allow surfaces to dry completely.
Measure each cabinet door, drawer front, backsplash area, and countertop section. Cut your interior film pieces approximately 2 inches larger than each surface to allow for positioning and trimming. Organize these pre-cut pieces in the order you plan to install them.
Saturday Morning: Cabinet Doors and Drawer Fronts
Start with cabinet doors and drawer fronts, as these are often easier to work with and will give you practice before tackling larger surfaces. Work with one piece at a time. Peel back a few inches of the backing paper and align the film at the top edge of the cabinet door. Gradually remove more backing while applying pressure with the squeegee to adhere the film, working from the center outward to prevent air bubbles.
For edges, use the heat gun on a low setting to make the film more pliable. Wrap the film around edges, applying heat as needed, then trim excess with the utility knife. Repeat for all cabinet doors and drawer fronts.
Saturday Afternoon: Cabinet Frames
After completing the doors and drawers, move on to the cabinet frames. These can be more challenging due to corners and joints. Apply the film in sections, using the same technique of peeling back the backing gradually while smoothing with the squeegee. For inside corners, cut the film precisely at the corner rather than trying to wrap it.
Sunday Morning: Backsplash
The backsplash is often easier than cabinets because it's a flat surface, but outlets and switches can present challenges. Cut the film to size for each section between obstacles. For outlets and switches, turn off power at the breaker, remove cover plates, and apply film over the entire area. Then carefully cut out the openings with a utility knife.
Sunday Afternoon: Countertops
Countertops are typically the most challenging surface due to their size and the precision required around sinks and cooktops. Work in sections of manageable size, typically 2-3 feet wide. For sinks and cooktops, apply the film over the entire area, then carefully trim around the fixtures.
Pay special attention to seams in countertops, ensuring the pattern aligns properly. For the front edge, use heat to help the film conform to the shape, whether it's a square edge, bullnose, or other profile.
Sunday Evening: Finishing Touches
Reinstall all hardware, being careful not to overtighten screws which could damage the film. Clean any fingerprints or residue from the surfaces with a soft microfiber cloth. Inspect all edges and seams, applying heat and pressure to any areas that need better adhesion.
With all surfaces completed, your kitchen transformation is complete! The entire process typically takes 12-16 hours of actual work time spread over the weekend, allowing for breaks and drying time. The result is a completely refreshed kitchen at a fraction of the cost of traditional renovation methods.